
Upgrading a commercial property is rarely as simple as picking new finishes and signing a contract. The real price tag hides in dozens of smaller line items that most owners never think to budget for until the invoices start arriving. Understanding where your money actually goes can help you avoid costly surprises, negotiate better with contractors, and prioritize the upgrades that deliver the most value. This breakdown walks through the major cost categories so you can plan your renovation with clear eyes.
Site Preparation and Ground Work Costs
Before any visible construction begins, most commercial upgrades require significant work below the surface. Grading, soil testing, and utility line verification can add tens of thousands of dollars to a project depending on the size of the property and the condition of the land. Many owners underestimate this phase because it produces no visible progress, yet it often determines whether the rest of the project stays on schedule.
If your upgrade involves expanding a building footprint, adding a parking structure, or installing new underground utilities, you will likely need to bring in an excavation contractor early in the planning process. Their pricing depends on soil type, depth of digging required, and whether old foundations or debris need to be removed first. Getting a site assessment before finalizing your budget can prevent expensive change orders later.
Heavy Equipment and Lifting Requirements
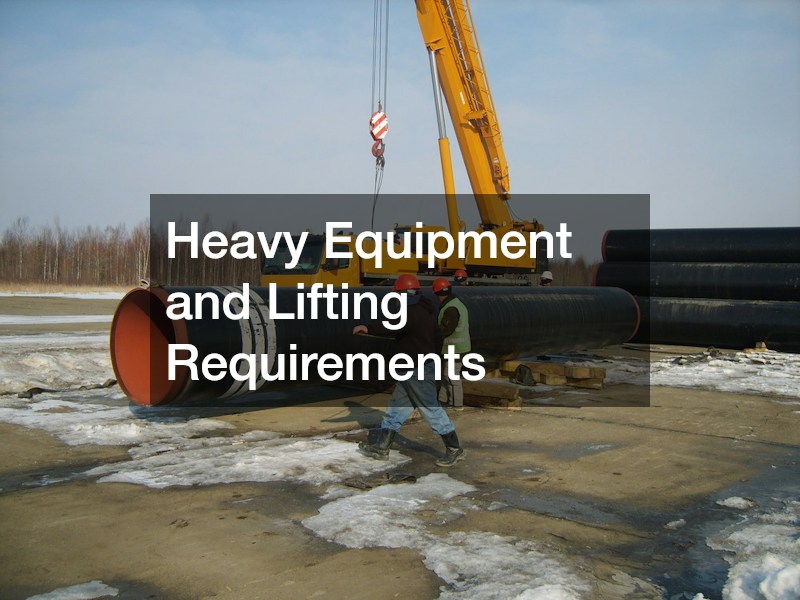
Larger commercial upgrades, especially those involving rooftop units, structural steel, or multi-story additions, often require equipment that most contractors do not own outright. This is where temporary equipment rental becomes a meaningful line item in the overall budget. The cost depends on the size of the load, the duration of use, and how much site access the equipment needs.
A crane rental is one of the more expensive single-day expenses in a commercial renovation, sometimes running into the thousands depending on tonnage and reach. Scheduling matters too, since renting for a half-day versus a full week changes the math significantly. Property owners should ask contractors for a clear breakdown of equipment costs separate from labor so they can see exactly what they are paying for.
- Crane size and lift height requirements
- Number of days or hours the equipment is needed
- Site accessibility and setup complexity
- Permits required for street closures or oversized loads
- Operator fees, which are often separate from the rental itself
Foundation Repair and Concrete Leveling
Uneven concrete is one of the most common issues property owners discover once they start planning an upgrade. Sunken slabs, cracked walkways, and settling foundations not only look unprofessional but can create liability issues for customers and employees. Fortunately, full replacement is not always necessary.
Many mudjacking companies offer a faster and less expensive alternative to tearing out and repouring concrete. The process involves pumping a dense material underneath the slab to raise it back to level, which typically costs a fraction of full replacement. This option works well for parking lots, loading docks, and sidewalks where structural damage is minimal but the surface has settled unevenly over time.
Flooring Materials and Installation Labor
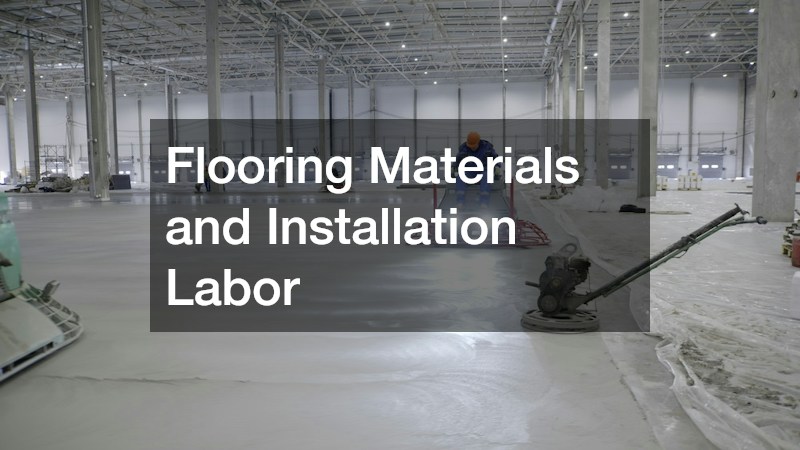
Interior finishes tend to consume a larger share of the budget than most owners initially expect, and flooring is often the single biggest surprise. The cost varies dramatically depending on material choice, square footage, and the condition of the subfloor underneath. Some businesses try to save money by choosing cheaper materials, only to face higher maintenance costs down the road.
Commercial flooring pricing generally includes both materials and labor, and the labor portion can equal or exceed the material cost if the existing floor needs significant prep work. Polished concrete, luxury vinyl tile, and epoxy coatings each come with different lifespans and maintenance schedules that affect long-term value. Owners should ask for a per-square-foot quote that separates removal, subfloor repair, and final installation so they can compare bids accurately.
- Material cost per square foot
- Subfloor leveling or repair needs
- Installation labor and timeline
- Long-term maintenance and warranty terms
- Downtime required during installation
Electrical System Upgrades and Code Compliance
Older commercial buildings frequently have electrical systems that were never designed to handle modern equipment loads, and upgrades often trigger code compliance requirements that owners did not anticipate. A building wired decades ago for basic lighting and office equipment can struggle to support today’s HVAC systems, commercial kitchens, server racks, or EV charging stations. Once a permit is pulled, inspectors typically require the entire electrical system to meet current code, not just the portion being renovated. Panel upgrades, rewiring, and additional circuits for HVAC or kitchen equipment can add substantial cost to a renovation. A single panel upgrade from 200-amp to 400-amp service might run $5,000 to $15,000, while a full building rewire can climb into six figures depending on square footage. Older buildings may also have aluminum wiring, knob-and-tube systems, or outdated grounding that must be replaced entirely rather than patched. Other common triggers include arc-fault and ground-fault protection requirements, updated emergency lighting and exit signage, and dedicated circuits for fire alarm or life-safety systems. ADA-related upgrades, such as accessible switch heights and outlet placement, sometimes get bundled into the same phase of work. Owners should also budget for load calculations performed by a licensed electrician early in planning, since these determine whether the existing service can be modified or must be replaced outright. Skipping this step is not an option if you want to pass final inspection. Inspectors will flag deficiencies regardless of whether they were part of the original renovation scope, and unresolved issues can delay occupancy permits for weeks. Building in a contingency budget of 10-15% for electrical work specifically is a common practice among experienced contractors who have seen these surprises play out before.
Before finalizing any upgrade plan, it is worth scheduling electrical inspections to identify problems before they become expensive change orders mid-project. A qualified electrician typically checks panel capacity, breaker condition, grounding, and wiring age, comparing what they find against current National Electrical Code requirements. In older buildings, this often uncovers aluminum wiring, knob-and-tube remnants, or panels rated for 100 amps trying to support loads that call for 200 amps or more. These inspections often reveal outdated wiring, insufficient grounding, or panels that are near or over capacity. They can also flag issues like double-tapped breakers, missing arc-fault protection, or junction boxes that were never properly permitted, all of which inspectors will require to be corrected before signing off on new work. Depending on the building’s age and size, a thorough inspection can run anywhere from a few hundred dollars to a couple thousand, which is a small price compared to what a mid-project surprise can cost. Catching these issues early gives you room to budget properly rather than absorbing the cost as an emergency fix later. It also lets you sequence the work sensibly, addressing panel upgrades or rewiring before contractors start closing up walls or installing finished fixtures on top of a system that will need to be reopened. Skipping this step is one of the most common reasons commercial upgrade projects blow past their original estimates.
Hiring a certified electrician for both the assessment and the actual work is not just a safety requirement in most jurisdictions, it also protects your investment. Uncertified electrical work can void insurance coverage and create serious liability exposure if something goes wrong later, potentially leaving you responsible for the full cost of fire damage, equipment loss, or injury claims. Before work begins, ask to see a current electrical contractor license, proof of liability insurance, and workers’ compensation coverage. Reputable electricians won’t hesitate to provide this documentation, and many jurisdictions let you verify license status online through a state or municipal contractor database. It’s also worth budgeting for the permit and inspection process itself, which often adds several hundred dollars and one to two weeks to a project timeline. Skipping this step to save money is a common mistake: unpermitted electrical work can surface during a future sale or refinance and force costly retroactive corrections. A licensed electrician familiar with local code will typically handle permitting and schedule inspections as part of the job, so confirm this is included in your quote upfront.
Exterior Boundaries and Site Security Features

Perimeter improvements are often treated as an afterthought, but they play a real role in both property value and safety compliance. New fencing, gates, and access control systems protect equipment, inventory, and employees, and they are frequently required by insurance providers for certain types of commercial properties. The cost depends heavily on material choice and the total linear footage involved.
Getting quotes from multiple fence companies is worth the extra time, since pricing can vary widely based on material, gate automation, and site terrain. Chain link remains the most budget-friendly option, while ornamental iron or vinyl systems cost more but require less long-term maintenance. Make sure any quote includes post installation depth and grading, since uneven ground can add unexpected labor costs.
Roof Drainage and Water Management Systems
Water damage is one of the most expensive problems a commercial property owner can face, and much of it stems from inadequate drainage around the roofline. Poorly managed runoff leads to foundation erosion, mold growth, and damaged landscaping over time. Addressing this during an upgrade is far cheaper than fixing water damage after the fact.
Proper gutter installation should be sized to the roof’s square footage and local rainfall patterns, not simply matched to whatever was there before. Commercial buildings often need larger downspouts and additional drainage points compared to residential properties. Investing in quality materials here reduces the likelihood of costly repairs within the first few years after the upgrade is complete.
Traffic and Pedestrian Safety During Construction

Any upgrade that affects parking lots, loading zones, or building entrances creates safety concerns for both employees and customers during the construction period. Ignoring this aspect can lead to accidents, liability claims, or even fines from local authorities if public right-of-way is involved. Planning for safe traffic flow should happen before construction begins, not after problems arise.
Many municipalities require permits and professional oversight for projects that impact public roads or sidewalks, which is where traffic control companies come into the picture. They handle signage, cone placement, flaggers, and temporary detours to keep the site safe and compliant. Building this cost into your budget upfront prevents delays that can occur if a project gets flagged for inadequate safety planning.
Tax Planning and Depreciation Strategy
Commercial property upgrades often qualify for tax benefits that many owners overlook simply because they did not plan for them in advance. The tax treatment of a project can vary widely depending on whether the work counts as a repair, an improvement, or new construction, and each classification carries different rules for how costs are recovered. Certain improvements can be depreciated over specific timelines under the Modified Accelerated Cost Recovery System (MACRS), with most commercial building components depreciated over 39 years. However, a cost segregation study can reclassify portions of a project—like carpeting, specialty lighting, or certain electrical systems—into 5, 7, or 15-year categories, dramatically speeding up deductions. Some upgrades may also qualify for accelerated depreciation or bonus depreciation, along with Section 179 expensing for qualifying improvements to nonresidential interiors, HVAC systems, roofing, and security systems. These provisions change frequently with tax law updates, so what qualified two years ago may not apply today, and new incentives may have appeared in the meantime. Missing these opportunities means leaving real money on the table. A $200,000 renovation that qualifies for accelerated treatment instead of standard 39-year depreciation could shift tens of thousands of dollars in deductions into the current tax year rather than spreading them out over decades, which matters significantly for cash flow and reinvestment planning.
Bringing in a business tax accountant before construction starts, rather than after the project is finished, allows you to structure expenses in the most advantageous way possible. Once contracts are signed and invoices are paid, many classification decisions are effectively locked in, so early involvement gives you far more flexibility than trying to sort things out retroactively. They can advise on whether certain upgrades should be classified as repairs versus capital improvements, since the tax treatment differs significantly between the two. Repairs — like patching a roof leak or fixing a broken HVAC unit — are typically deductible in the year they occur, while capital improvements, such as a full roof replacement or a system upgrade, must generally be depreciated over several years under IRS guidelines. A knowledgeable accountant can also help you take advantage of accelerated depreciation methods, like cost segregation studies or Section 179 expensing, which can shift deductions into earlier years and improve cash flow. For example, reclassifying certain building components as personal property with a 5- or 7-year life, instead of lumping everything into a 39-year commercial real property schedule, can free up tens of thousands of dollars in near-term tax savings on a mid-sized renovation. This kind of planning can meaningfully offset the overall cost of the project once tax season arrives, and it also reduces the risk of costly reclassification if the IRS later questions how an expense was categorized.
A commercial property upgrade touches far more systems and specialists than most owners initially realize, from what lies beneath the ground to what protects the perimeter and the paperwork that follows after completion. Breaking the project into these individual cost categories makes it much easier to build a realistic budget and avoid the surprises that derail so many renovations. Before signing any contracts, gather detailed quotes for each phase of the work and ask questions about what is included versus what might be billed separately. Taking this careful, informed approach now will save both money and stress once the work actually begins.